Introduction Link to heading
Are you still using numbers and dots to navigate through the WWW? I’m pretty sure you’re not, so why should use it then to navigate through your homelab services? That’s right, your homelab deserves better, so let me show you how you can easily attach a domain name to each of your homelab service.
Getting Nginx Proxy Manager Up And Running Link to heading
We’re gonna be using our beloved Proxmox Scripts to get started with Nginx Proxy Manager. Simply copy the script into your Proxmox Node shell and go on with the default settings, cause they’re pretty much enough for any number of services you’re going to be running. When the script is done and you see a new LXC appear in your left side bar, you’ll be pointed to an IP address of your Nginx Proxy Manager and that’s where the fun begins.
Configuring Nginx Proxy Manager Link to heading
Default Credentials Email address - [email protected] > Password - changeme
Once you log in to your proxy manager, you’ll be greeted by the screen similar to this and will be offered to change the default credentials.

Keep in mind, you need to put in a real email address for certificates to generate successfully.
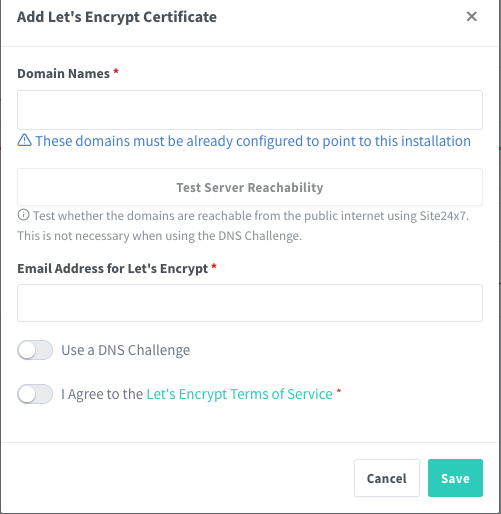
Once done, you should head out to SSL Certificates tab and press Add SSL Certificate and choose Let’s Encrypt.

Let’s say your domain is example.com, in this case you’d fill Domain Names with
*.example.com
So that all the subdomains are managed by our Nginx Proxy Manager.
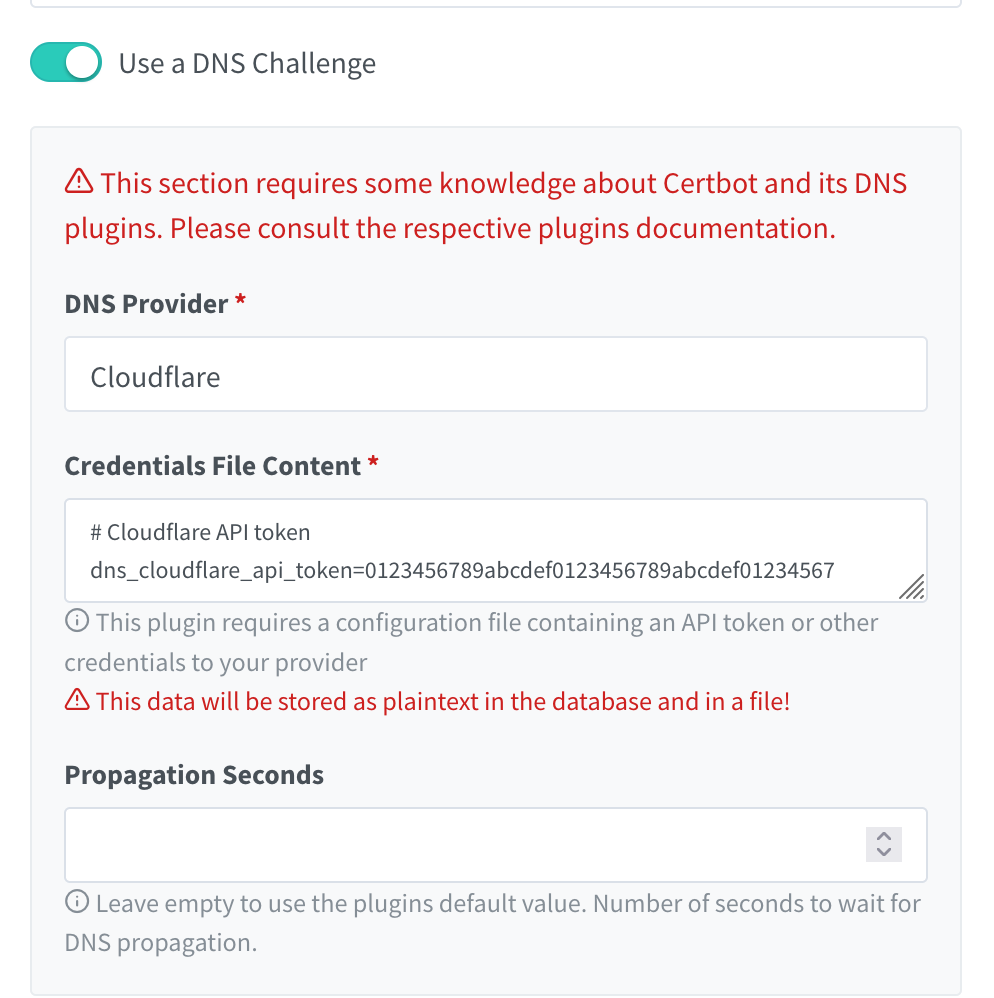
Next part is, make sure you switch Use a DNS Challenge and choose your DNS Provider, I’m going to be covering Cloudflare case.
Configuring Cloudflare Side Link to heading
Once you’re logged in to your Cloudflare dashboard, head to your profile and API Tokens.

Here you want to create a custom API token with any name you’d like and configure it the same way as shown.

After creating the token, save it somewhere, you’ll need it in a bit, now go to DNS configuration of your domain and set an A record the same way as shown.

And do the same for the domain root.

Now you can go back to Nginx Proxy Manager and add the token you created instead of the placeholder one.

Make sure to have propagation seconds of 120 or more.
At this moment, you have almost finished setting up the proxy manager. One last thing you need to do is adding your hosts.
Adding The Hosts Link to heading
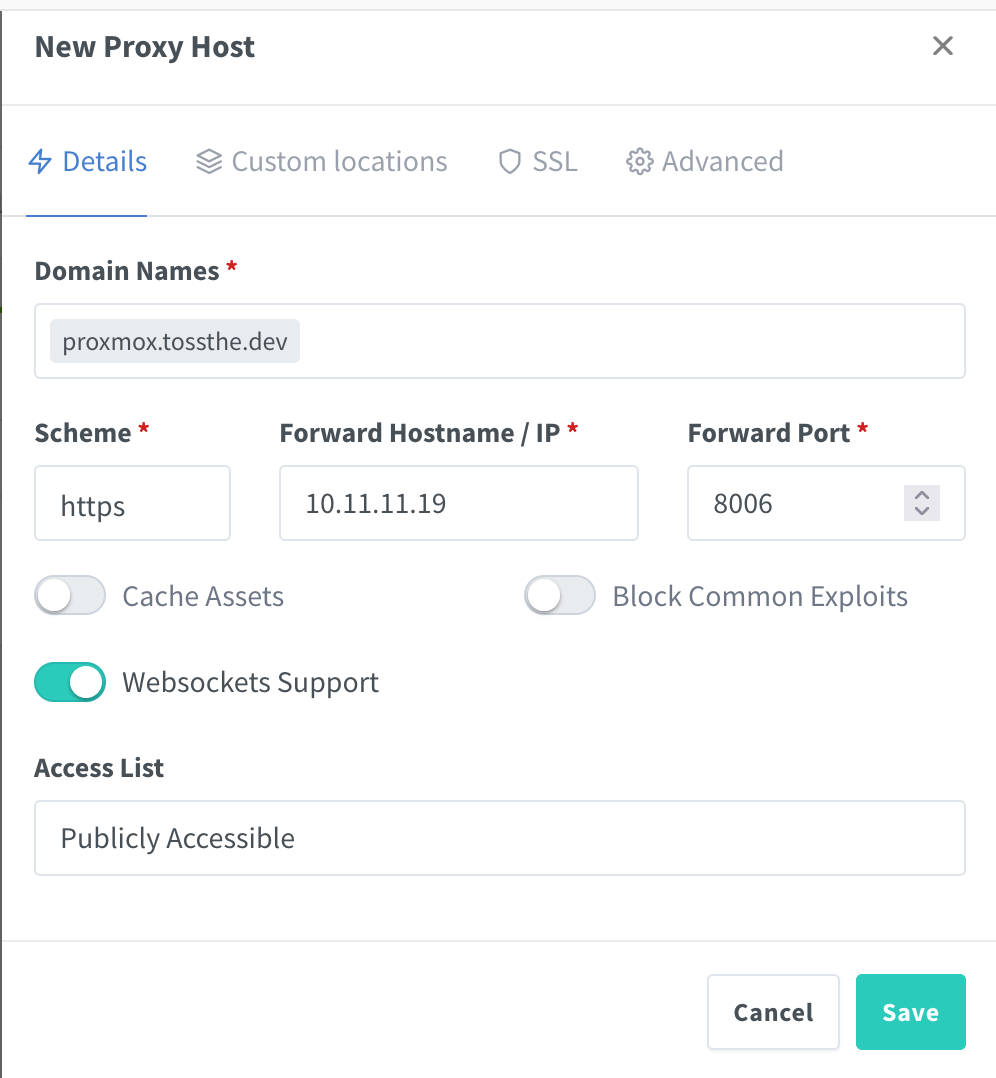
At this moment, you can add some service from your homelab to the Nginx Proxy Manager. Let’s suppose you want to access Proxmox via domain name.

One major thing to consider is whether your service is running via HTTP or HTTPS initially.
If your service generates it’s own certificate and runs on HTTPS, select HTTPS in the dropdown, otherwise leave HTTP
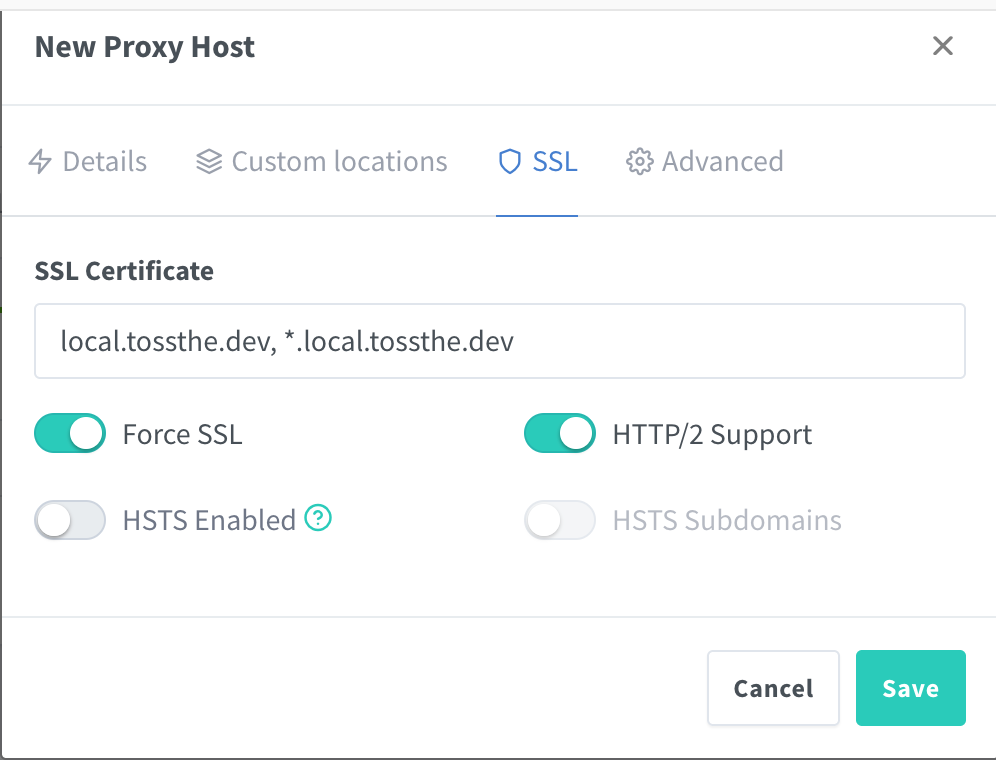
After this, go to SSL tab and select your SSL certificate that you’ve generated and switch the Force SSL and HTTP/2 Support switches, so that it looks like this.

At this point, you can already use your domain name to access the service and no more SSL warnings. Voila!
Thank you for taking the time to read :)
If you enjoyed the article, you’re welcome to join the Discord community.