Proxmox Cloud-Init Tutorial: Automate Your Homelab VM Deployment
Learn how to set up Cloud-Init in Proxmox to automate homelab VM deployment. Save disk space, speed up provisioning, and manage SSH keys, passwords, and networking with ease.
Introduction
Are you still using regular VMs instead of Cloud init? Well, I’m here to save your homelab disk space, but it’s not only that. Cloud init VMs also let you configure all your VMs the same way, but you only have to configure it once and the same settings will be used for all of them.
💡 Quick answers: Jump to frequently asked questions about Cloud-Init.
Download & Install Cloud-Init Image in Proxmox
- Download cloud-init image to your Proxmox instance
wget https://cloud-images.ubuntu.com/noble/20241119/noble-server-cloudimg-amd64.img- Resize the downloaded image to your liking, e.g +10G
qemu-img resize noble-server-cloudimg-amd64.img +10G- Create a new VM
qm create 4000 --memory 4096 --core 4 --name cloud-init --net0 virtio,bridge=vmbr04000 is basically a random ID, you can have it at any ID you like.
Template created will have 4G of RAM and 4 CPU cores allocated.
- Import the IMG file into created VM
qm disk import 4000 noble-server-cloudimg-amd64.img local-lvmSwap out
local-lvmfor the name of storage you’re using
- Attach new disk to scsi controller
qm set 4000 --scsihw virtio-scsi-pci --scsi0 local-lvm:vm-4000-disk-0Don’t forget to swap out
local-lvmhere as well
- Add Cloud-Init drive
qm set 4000 --ide2 local-lvm:cloudinit- Make it bootable and force VM to boot from that disk only
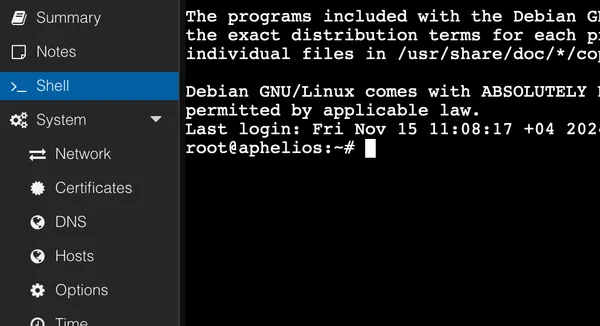
qm set 4000 --boot c --bootdisk scsi0- Add Serial Console
qm set 4000 --serial0 socket --vga serial0Serial Console is required for VNC interaction inside Proxmox web interface
Set Cloud-Init VM Properties in Proxmox
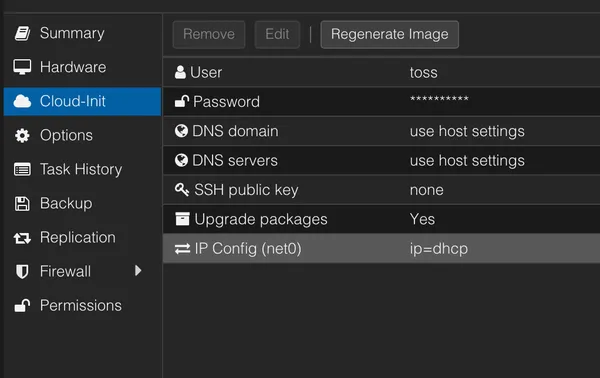
- User - Username you’d like to use to log into your VM
- Password - Password you’d like to use to log into your VM, you can leave it empty if you only plan to use the system with SSH.
- DNS Servers - If you want to use a different DNS server for your VMs, you can set it here
- SSH Public Key - Your key to log into your VM
- IP Config - Network interface configuration and static/DHCP IP configuration
Create Full or Linked VM Clones with Cloud-Init
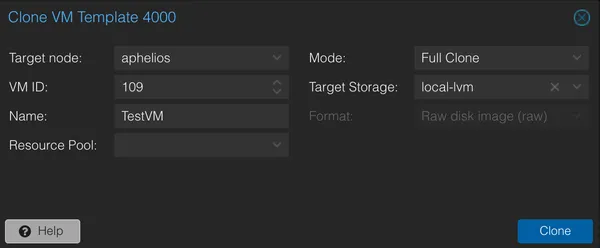
Right click your VM template and choose Clone.
Key thing to consider is whether you want to use Full or Linked clone.
Full clone will clone the whole hard-drive attached to a VM into a separate storage
Linked clone will be linked to the same hard-drive but you can’t delete the template until you delete all the VMs attached to it
Test Your Cloud-Init VM Setup in Proxmox
After the clone has been done, you can use your VM as you’d like.
ssh [yourusername]@[yourIP]Enable Password Login for Cloud-Init VMs in Proxmox
If you want to use password for SSH log-in, you’ll need to configure it in a serial console. It’s easy, just follow along.
cd /etc/ssh/sshd_config.d/

vim 60-cloudimg-settings.conf

or

nano 60-cloudimg-settings.conf
Replace no with yes and restart your SSH service.
sudo systemctl restart sshAnd you’re done.
💡 Frequently Asked Questions
What is Cloud-Init and why should I use it in my homelab?
What is the difference between a Full Clone and a Linked Clone in Proxmox?
Can I use Cloud-Init VMs without SSH keys?
Thank you for taking the time to read :)
If you enjoyed the article, you’re welcome to join the Discord community.